Thursday 21 February 2013

From the Archives: 1970 Mustang Boss 429


I built this mean-looking Mustang about 5 years ago. It is built from the 1/25 scale Revell 1970 Mustang Boss 429 kit, which includes parts to build a standard (stock) version or a custom version. Well, I like drag cars, hot rods and customs a lot, but for some reason I have never liked to see modified Mustangs: to me, the original sleek look is just right and difficult to improve upon. So, I decided to build it as a factory-fresh car in an original Ford colour.  

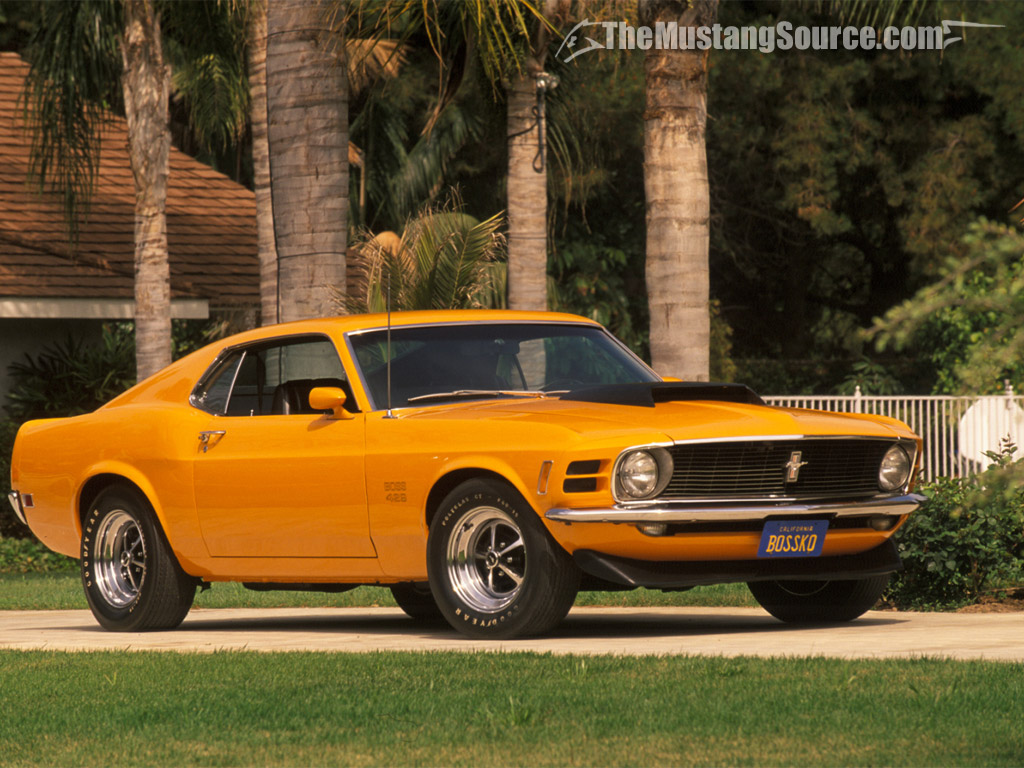
History: I won’t go on at length about the real Mustang Boss 429, after all if you are reading this you can read about them online, but it is quite an unusual Mustang. The Mustang was introduced by Ford in early 1965 as a new kind of car for American buyers: a smart-looking 2-door car with sporting aspirations and an extensive options list which enabled buyers to specify their car to be what they wanted, from a basic 6-cylinder cruiser to a hot V8-engined flyer with sports wheels and racing car gauges. By 1970, it had grown into a larger but meaner-looking car with bigger engine options, and the 429 (7-litre) big block V8 was one of the biggest ever available in Ford’s blue-collar sports car. The Boss Mustangs were really a marketing gimmick to capitalise on the contemporary wacky muscle car trend, and the Boss 302 and Boss 429 arrived at the height of the scene. Despite Ford’s marketing claims at the time, the 429 was not a superfast street rod like the Plymouth Barracuda, and it was not a nimble lightweight like its predecessors: it was designed to run endless fast laps on the racetrack, its huge 429 cubic inch (7-litre) V8 engine providing enough torque for effortless high speed.

The kit: The Revell kit is pretty good, though it has a few pitfalls which I did not manage to completely overcome, more on that later. American muscle cars are a bit odd from a modeller’s perspective – they came in a variety of exterior colours, but the interiors were mostly either black or white (some manufacturers offered other colours but white and especially black seem most common). My reference materials, chiefly the brilliant 1989 'Complete Book of Mustang' by the editors of Consumer Guide, showed white as a common colour for the 429, particularly with my preferred exterior paint colour Grabber Orange.

The interior parts were sprayed with Tamiya XF-2 white acrylic and the body shell was given a coat of the same white, followed by a gentle covering with Tamiya X-6 orange acrylic, a reasonable match for Grabber  Orange. The purpose of spraying the orange over a white basecoat was firstly to provide a smooth, matt primer coat for the orange, and secondly to give a bright white undercoat to make the orange ‘pop’ (the orange is brightened by the white coat beneath). The orange paint was then coated with a couple of shots of Johnson Klear floor polish which gives a subtle but quite realistic shine. The hood scoop, rear window slats and rear spoiler were given a coat of satin black as on the real Boss 429.
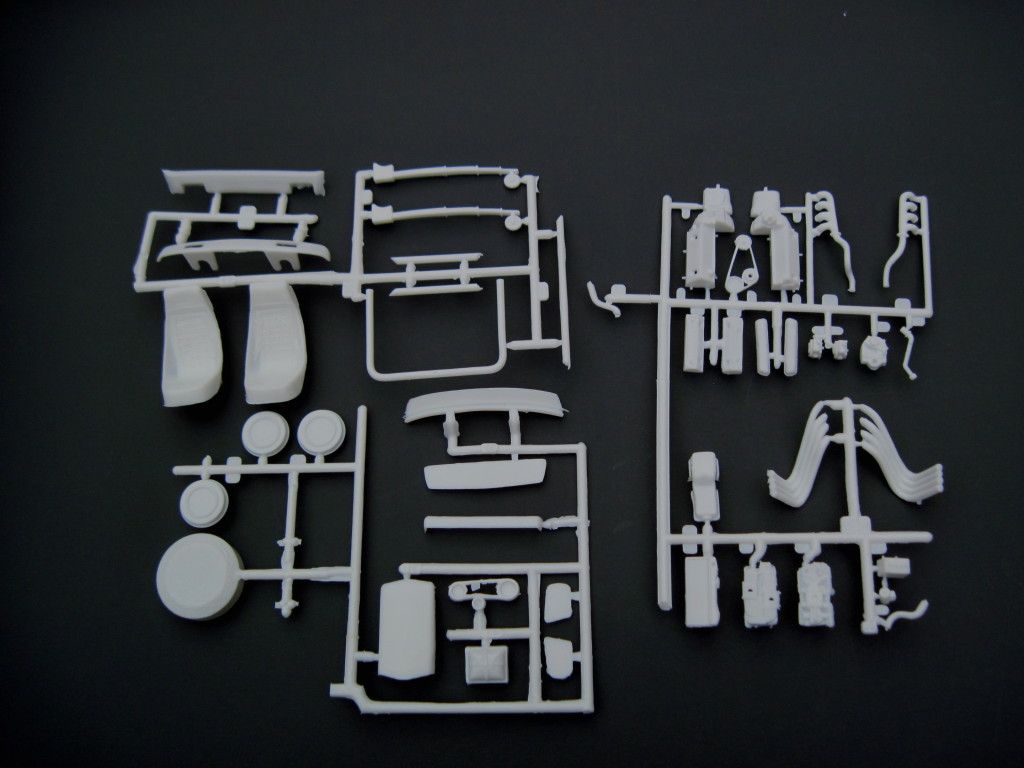
The fantastic 7-litre Ford V8 engine was brush-painted with a colour similar to Ford engine blue. It is nicely detailed in the kit and includes some nice manufacturer decals to add realism to the engine bay. I added sparkplug leads using 0.3mm black wire and gave the engine bay a coat of satin black paint to match those in my reference photos. I was careful when assembling the big engine to ensure that it sat low enough to allow the hood to close, though unfortunately the hood is not a very good fit on this model, being slightly warped and creating a poor join in the trim along the top of the grill and headlamps. As with many muscle cars, the Boss was fitted with Magnum (known as Rostyle in the UK) wheels with matt black segments, which were painted in carefully with a brush and some matt black enamel paint. The decals, other than those inside the engine bay, were limited to license plates and a small '429' motif behind the front wheelarches.
Overall I like this kit, though there is room for improvement. The overall shape is very good, though the front grill is a little too tall and not quite the right shape. Also, the real car was (and is) a rarity, so it feels as though build options and colours are limited if you intend to build it as a standard car.

Bad bits:
Poor hood fit is clearly visible from the front
The grill is a little too deep
Good bits:
Nice overall shape and detail
Well-detailed engine bay
Assembly generally straightforward

Sunday 17 February 2013

Project Heavy Haulage: Update 2

For Update 1, click here

Having got the Volvo’s chassis extended and painted, I decided to do some more work on the cab interior. I had been holding off from finally assembling the cab because I intended to add some extra details to bring life to the model, so this was my next focus.
Access to the internet and colour printers have made for some real advances in modelling. The internet is invaluable for research and for finding images of things you want to make, and with the aid of a colour printer, you can reproduce detail items in scale and add them to your models. This is what I did to add a lived-in look to the Volvo’s cab interior.

I thought about what a heavy haulage driver might have lying around in his cab, and came up with a shortlist: soft drinks, cigarette packs, soccer and truck magazines and a hi-visibility vest. I set to work finding colour images on the internet of those items, and having saved the images onto my PC’s hard drive, I then embedded the images into a Word document and using the built-in ruler and a calculator, reduced them in size to be 1/24 scale. When printed out, these were folded as necessary (the Pepsi label was wrapped around a plastic rod, cut to length) and added to the cab interior. I also printed out some soccer team pennants and a scarf and put them in the windscreen (I chose Beerschott, the Antwerp team, to fit the Belgian operator theme I had decided on for the truck). Once these bits and bobs were placed in the cab with PVA glue, I finally fixed the interior into the cab shell.

I needed to get on with the chassis detailing before I fitted the cab, so it was time to look at what parts still remained to be fitted: the main items were the diesel tank, exhaust system and battery box. Model truck diesel tanks are notoriously awkward to finish because they always seem to be moulded in two semi-circular halves, leaving an obvious join along the length. Also, they tend to be made of stainless steel, as are things like the battery box and exhaust expansion box. So, the first job was to assemble the two halves of the diesel tank: I used a little Squadron Green Putty to fill the seam, which was sanded and smoothed before painting with satin black paint. Why satin black? I’ll get to that in a moment. The battery box and exhaust box, already assembled and smoothed, had already been painted with the same grey paint as the chassis.
Stainless steel is very hard to replicate in model form, but there are a few products available which give a fairly realistic look. I decided to use Alclad Chrome , which is specially formulated for creating metal finishes on models. Alclad can only be applied with an airbrush, so I used my old Aztec A470 to apply a coat of Alclad onto the diesel tank, battery box, exhaust  and front wheel trims. Spraying Alclad onto gloss black gives the best possible shiny finish, but spraying it onto the satin black diesel tank gave a realistic dull metallic look. Applying it to the grey battery box and exhaust box gave a silvery aluminium finish, not quite what I wanted but still quite nice. The black plastic wheel trims turned out pretty shiny like stainless steel.
I had decided at the start of the project to add a crane to the Volvo, as often found on real heavy haulage trucks. The easiest way to get hold of a suitable crane was to buy the Italeri Truck Accessories 2 kit, which includes a great little crane. The crane turned out to be quite a complex model in its own right, and so far I have built the main assemblies and given it a coat of yellow car spray paint. It still needs the hydraulic pipes and other details adding, followed by some dark washes to tone down the dazzling yellow paint.
Next jobs for Project Heavy Haulage: Finish the crane. Fit the chassis details. Fit and complete the cab.

Thursday 14 February 2013

Beginners’ Workshop 2: Gluing and joining

Welcome to the Beginners’ Workshop. Some of you experienced modellers might prefer to skip this post, but I hope some newcomers to the hobby will pick up a few tips here.
Gluing parts together: that is the essence of model making for many people and to be fair, it is the central process for any build, but there are a few misconceptions. People who have never built a model often assume that they are stuck together with ‘superglue’. When I was a young modeller, I learned to NEVER use superglue. And as for PVA wood glue, surely it has nothing to do with assembling a plastic kit? Here, I will try to clear up a few misunderstandings and hopefully offer some useful advice.
POLYSTYRENE CEMENT
So, what do you stick kits together with? The preferred glue for assembling a conventional plastic model kit (the ‘plastic’ is a form of polystyrene, or styrene for short) is polystyrene cement, which is sold in model shops and hobby stores under various brand names and is specially formulated for kit building. Despite the ‘cement’ name, it has nothing to do with building cement! It actually does a different job to most other adhesives: it melts (very slightly) the surfaces of the plastic parts being joined, and forms a bond as the melted areas fix to each other. Because it is the glue most people first attempt to build models with, it is also the glue that people associate with poorly-built models from their junior years. It can make clear parts cloudy, and it doesn’t stick chromed or painted parts very well because the plastic underneath the coating cannot melt. This type of glue is available in tubes, jars and precision applicators from most model shops.  
Upsides:
It is the best adhesive for general kit building
Used properly, it forms a strong bond for years
Readily and cheaply available, can be kept for years
Downsides:
It clouds clear plastic on contact, spoiling windows and lights
Does not stick chromed or painted parts reliably

SUPERGLUE
Cyanoacrylate, or superglue as it is usually known, is great stuff but has its drawbacks. Unlike polystyrene cement, it works by simply forming a solid coating on the surfaces it is joining, bonding them together. It dries in contact with air, so a thinner coating dries quicker. People sometimes joke about sticking their fingers together with superglue and joining your fingers to each other – or to other things – is all too easy. Superglue is not ideal for joining kit parts together because it can warp or dissolve styrene, and it is almost too good at its job, bonding your kit parts, your tools and your fingers to each other at any opportunity. However, it does a couple of important jobs very well: chrome-plated parts and painted parts, often impossible to join with polystyrene cement, are easily joined with superglue. Resin and white metal parts can also be assembled with superglue.

Upsides:
Sticks practically any materials together – chromed parts, metal, resin
Cheap and easy to get hold of
Bonds quickly
Downsides:
Can ruin kit parts
You WILL glue your fingers to something unexpected at some point

PVA (WOOD GLUE)
What good is PVA wood glue for modelling? PVA is great for lots of jobs, especially if you are creating display bases or dioramas. PVA (polyvinyl acetate) is formulated for joining wooden parts together, which it does well. PVA works by soaking into the parts and setting hard, so it is best at joining together porous materials like wood and card. PVA can be diluted with tap water, which is excellent for creating gravel tracks and grass fields for your models: you can sprinkle your miniature gravel or grass onto your display base, then drip diluted PVA over it which will set hard overnight, fixing your scenic material in place.
PVA is what I always use for installing glazing or light lenses in models, whether it is a car, truck, aircraft or whatever. Though in theory PVA should not be able to do this job, it does it brilliantly – it dries clear, it does not cloud the clear plastic, and it sticks well enough to hold the parts in place thanks to its rubbery polymer form. Best of all, it does not create nasty fumes and does not irritate your skin.
Upsides:
Cheap and easy to buy
Harmless to your kit parts and to your skin (the glue you used to get all over your hands and enjoy peeling off at school was PVA)
Can be diluted for various uses
Downsides:
Not suitable for general kit assembly
When diluted, takes hours to set

HOT GLUE GUN
Glue guns work by heating up sticks of solid glue and releasing a stream of melted glue from a nozzle which, when cool and hardened, bonds almost any surfaces together. This kind of bonding ability is essential for heavy jobs like carpentry but not necessary for assembling kits, and in any case hot glue is not ideal for easily-melted plastic parts.
Upsides:
Creates very strong bonds
Downsides:
Too hot to use with plastic parts
Not designed for fine work, so too clumsy for kit building
Glue sets when it cools, so you need to fix parts together quickly
Not recommended for modelling at all

OTHER OPTIONS

There are other types of adhesive out there, and a few other materials which can be used as adhesives. Epoxy glues and contact adhesives are very strong but often damaging to kit parts. Various kinds of varnish can be used as adhesives, though beware the solvent properties of many of them. Some household products like Johnson’s Klear floor polish (sold in the US as Future) are also used by some modellers, though apparently Klear is only suitable for gluing small parts as it does not form a strong bond. I understand it is also good for fixing clear parts though I have never tried it as an adhesive myself.
Do you have more suggestions for useful modelling adhesives? If so, please comment below.
 

Monday 11 February 2013

Guest Spot: Big Block Laurie’s ’67 Charger

A real '67 Charger lays rubber at the strip
While working on a ’68 Dodge Charger for a friend (see this post), I discovered that one of my colleagues also has fine taste in muscle cars and, after a modelling layoff of many years, had begun to accumulate a few muscle cars kits to build. Big Block Laurie (so named on this blog for his affection for proper, mountain-motored muscle machines) had decided to revisit a long-ago started 1/25-scale Revell ’67 Dodge Charger and having just completed it, he has kindly agreed to share some photos for this blog. So, we go straight from a street ’68 Charger to a strip ’67 Charger!

Big Block Laurie encountered one or two problems during this build, though they are the kind of pitfalls that spring up for model builders regardless of whether they have been away from the hobby for 10 years or 10 minutes. The big one, and this is often a subject of concern for car modellers, was the paintwork. He chose to use aerosol paint and starting off with blue acrylic, didn’t get the finish he wanted. A metallic blue followed (after much sanding) before being itself over-coated with the dazzling red you see in the photos. Despite the paintwork woes, I think the finish on this charger is very nice and worth the work that went into it.

One problem with long-term builds is that parts go missing, and the Charger’s doorhandles seem to have disappeared for good. Having also had trouble with the flimsy wiper mouldings, Laurie decided to do without those stock parts and build the car as a dedicated strip machine. Together with its 426 hemi V8, tall drag slicks and open headers (manifolds in the UK) this Charger is a quarter-mile machine which would certainly annoy anybody’s neighbours – and probably break their windows – so is best kept for the drag strip.

Though the drivetrain is very definitely geared for competition, the Charger’s interior has been left factory stock apart from a dash-mounted tachometer, which together with its garish racing decals, makes it typical of a weekend drag car from the 1970s. Another problem encountered during the final stages of the build was with the stripe decals: being flat, decals don’t like being made to follow bodywork contours, and Laurie found that the hood stripes broke up a little when they were made to fit over the hood scoop.

The ’67 looks great with its racing decals (these stickers often come free with real performance parts for racers to apply to their cars) and you can see a nice spray of black rubber along the bottom of both rear quarter panels, suggesting a build-up of tyre rubber accumulated during numerous burnouts and launches at the strip. You will also notice that the front grill has been washed over with black paint to accentuate the grill pattern and give a more lifelike appearance.

I understand that the ’67 Dodge Charger kit dates from around 2000 and as such, has nice detail and goes together pretty well. Certainly the rear end looks nice, with the full-width chrome trim with translucent red plastic infill, and the engine bay and interior also bear close inspection. Though Laurie was concerned about his skills after a lengthy break from the hobby, the end result shows that he has real ability and obviously knows how to turn out a good-looking drag car. Certainly, touches like the fine black wash on the grill and the rubber marks on the rear fenders are well executed and not the work of an amateur. Laurie already has plans to crack on with another muscle car kit from his cupboard, most likely a Chevy Nova, and I look forward to seeing some photos of his next 1/4-mile killer. Keep watching for more of Big Block Laurie’s work.

Sunday 10 February 2013

From the Archives: 1968 Dodge Charger Part 2


In my last post I explained that this 1968 Dodge Charger was built as special request for my friend Chris. Having painted and assembled the engine, interior and body, the main sub-assemblies of the Charger were ready for fitting together. This particular Revell kit only dates back to 2007, so the fit of the parts is very good and I had no major difficulties in fitting the body, interior and chassis together. The trickiest part was getting the huge V8 engine, with its large racing manifolds (headers), to sit between the inner wings but after some sweating it finally went in with enough room for the hood to close. With everything in place, the decals (including 'Charger' scripts and the white stripes on the rear end) were applied.

I intended to weather the car (that is, make it look used and dirty) in line with Chris’s request for an outlaw’s car, and this is much easier when the car is more or less complete. The engine and engine bay were given a wash with diluted brown oil paint, followed a few days later by a wash with diluted black oil paint. Done subtly, this gives the impression of oily metal and accumulated mechanical filth. It is effective and pretty easy to do: look out for my post on weathering, coming soon.


For the bodywork, I started off the weathering with a few odd scrapes with a tiny piece of very rough sandpaper, deliberately gouging the paint: these areas were touched in with dry-brushed silver enamel paint, as if the red paint was missing or worn away. The car was then rubbed over with pencil graphite. Using powdered graphite is an easy way to add grime to a vehicle which is basically shiny (not muddy) but has years of grime stuck to it. Simply scrape a pencil lead with a scalpel blade, making a small pile of graphite powder, then apply it to the model with a fingertip. It adds a grimy look while also giving a metallic appearance. I did this here and there on the red paintwork and the white vinyl roof, though the trick is to only do it sparingly to create a believable look. The underside was given a thin spray with tan paint with my airbrush, which I allowed to extend a little way up the sides of the car to simulate dust and dirt.


To complete the outlaw image, I made a few other changes to the model: I added a few bullet holes to the rear window and passenger-side C-pillar using a pin vice, and I removed a rear lamp glass and added a dent in the rear bumper to simulate a small collision.

The whole model then received a once-over to fill in any 'clean' areas, such as the exhaust tips which were given a good brush with black oil paint to simulate soot.


This was a really fun build, made more interesting and more challenging by having a strict specification to follow. The Revell 1968 Dodge Charger kit is well designed and builds very well, plus it comes with various optional performance parts (like the big Hemi V8 and racing wheels I used) as well as run-of-the-mill parts like steel wheels and a hood without the big airscoop. If you want to build a nicely detailed muscle car with some good options, I recommend this kit.

Thursday 7 February 2013

From the Archives: 1968 Dodge Charger Part 1

My friend Chris and I both fondly remember the kind of outlaw characters which were popular in the 1970s and 80s, when Smoky and the Bandit and The Dukes of Hazzard were required viewing for young car fans. The films and TV programmes of that style portrayed outlaws as loveable rogues with little respect for the law but hearts of gold and, of course, much better cars than the policemen who were trying to catch them. Standard issue back then for a TV or big-screen outlaw was a good ol’ American muscle car with a big V8 engine and – to young British eyes – unbelievably cool body styling.


A while ago I asked Chris what, if any, kind of car he would like me to build for him, and invited him to submit a specification, which he did. As a man who knows his cars, he asked for a 1968 Dodge Charger (very similar to the Dukes of Hazzard car) with a detailed spec: red paint, white vinyl roof and interior, 5-spoke mags, roll cage, a massive 7-litre hemi V8 engine and interestingly, a few scrapes and some dirt to make the car look like it had seen some action.
After a lengthy case of modeller’s block, I eventually began work on Project Charger and after priming the body parts with Halfords white plastic primer, laid down a smooth coat of Mini chilli red. I masked off the roof, keeping the white primer clean to represent the white vinyl roof. The interior parts also had a coat of white primer. The interior was the first part to be built, and it was made to look pretty messed-up in line with the ideas Chris had given me.
The main job inside was to make rips in the seats: this was done by drilling through from underneath the seat facings to create holes, then joining the holes up into long gashes with a craft knife. I then made some exposed stuffing with some cotton wool, glued under the seats with PVA glue and teased through the holes, and darkened with tan paint. The effect is a bit over the top but as often with model making, it doesn’t look real unless it’s more than real. I finished up with a good wash over with diluted black oil paint to give a stained appearance to suggest years of use. I also added a couple of extra bits of clutter, including a couple of Marlboro packets made from squares of white plastic painted with red and black bands to look like the real thing.
The next job was assembling the engine. The Chrysler 426 Hemi is a classic engine, and it was a pleasure to build this nice big V8 mill with a few added details. The most obvious added detail here is the inclusion of sparkplug leads or HT (high-tension) leads running from the distributor to all 8 sparkplugs. This was done by cutting 8 lengths of 0.3mm black wire and super gluing them into a drilled hole in the distributor, then bending and routing them into 8 holes drilled in the correct places in the valve covers. The engine block and heads were painted with red enamel paint, the valve covers were painted with Tamiya gun metal grey, and the air filter (a chromed part) was coated with matt lacquer. The whole engine was given a few washes of diluted black and brown oil paint to give an oily, worn appearance. While I was at it, I gave the chromed 5-spoke wheels an oily wash too.
See Part 2 for the finished build.

Sunday 3 February 2013

Beginners’ Workshop 1: Cutting

Welcome to the Beginners’ Workshop! Some of you experienced modellers might prefer to skip this post, but I hope some newcomers to the hobby will pick up a few tips here.


Most people associate model building with gluing things together, but before you can start assembling a kit you will need to get to grips with cutting. Most plastic kits are delivered to the customer with all the kit parts attached to a nice, organised frame or fret (sometimes called the ‘sprue’in the UK). The sprue not only keeps the parts in order during transit, but allows the model manufacturer to add a part number alongside each piece, which is then referenced during construction.


So, the first job when you begin assembly is to remove the first parts from the sprue and clean them up prior to putting them together. For the first job, I use a nice, cheap and easily replaceable craft knife. It doesn’t need to be capable of precision cutting, but it does need to have a good grip and a strong blade. I have broken many scalpel blades (more on scalpels below) doing this, and it really is worth having a cheapy craft knife to hand for getting the parts off. Be careful: it is easy to angle the blade wrongly and end up removing a tiny chunk from the actual part.


Another option is to use a pair of purpose-made snips or even small scissors. Some model and craft manufacturers like Tamiya and Revell sell craft knives which are almost if not as fine as scalpels, but I prefer to use a cheap, strong craft knife for this job.

What’s that green grid in the photos? That’s a self-healing cutting mat – an excellent product which acts as a cutting surface to prevent damaging your desk or work surface. Even better, it is slightly cushioned so it absorbs the force of your hand pushing the blade down and reduces the likelihood of small pieces pinging off the desk and across the room! It also automatically heals and hides any cuts.


OK, the parts are off the sprue but are they ready for assembly? Not yet – the chances are, you need to tidy up the cut you just made and perhaps remove some ‘flash’ (flash is a thin membrane of excess plastic sometimes found along the edges of kit parts, caused by worn moulds). You can use a scalpel to remove any excess: a nice sharp scalpel blade will remove excess plastic by running along the edge of the part at 90 degrees, or you can level the blade and carefully trim it. Scalpels are made by companies such as Swann-Morton, who also supply replacement blades which clip ontp the metal handle. Scalpel blades are flexible but will break easily if you apply too much pressure, so use a craft knife for tough jobs.


Otherwise, a piece of rough sandpaper or wet-and-dry paper (something like 400 or 600 grit – the grit rating should be printed on the back of the paper) will easily remove any flash or untidy sprue cuts. 

What if you want to do some real cutting? Though the styrene used to make model kits is a soft plastic, a craft knife or scalpel will still only cut through a millimetre or so. To cut any further than that, you need a saw. However, a hacksaw from your local DIY shop is too imprecise to be much use: its chunky teeth will remove too much plastic from your project and it is too likely to damage the surrounding plastic. Instead, you need a razor saw. This is a thin, fine saw which has sharp teeth to quickly cut through styrene but without removing lots of material. The blade is fine and flat, allowing you to get close to the rest of the part you are cutting and cut exactly where you need to. It is called a razor saw simply because it is thin and flat: it is not related at all to razor blades for shaving.

Taking time to cut and finish pieces carefully before assembly pays great dividends during the build: it means your parts will fit properly, and it means they will look good and be ready for paint.
Do:
Check the instructions to see if you’re removing the correct part from the sprue
Cut away from the part when you’re removing it from the sprue, to avoid cutting into the part
Take great care trimming pieces: remember, you can always trim again if you need to but you cannot replace missing plastic if you go too far
Do not:
Remove parts from the sprue by twisting or pulling them – this can damage parts
Cut parts close to your body, like over your thigh or towards your thumb, and stick the blade into your skin. Ask me how I know…
Place stress on the part being cut. If the plastic starts to turn white, this indicates stress which will break or distort the part
Be afraid of getting it wrong: there is always another kit to build, so get stuck in and enjoy yourself.