Sunday 28 September 2014

On the Bench: Citroen 2CV Part 4 (Finished)


The simple Revell Citroen 2CV project I started while waiting for my house move to go through is finally done.
 
Last time in Part 3, the 2CV’s main assemblies were fitted together leaving me with a recognisable, but still unfinished, 2CV. Over the last couple of days I have finished assembly (this was just a case of fitting the glazing, bumpers, roof and trim parts) and applied some weathering to make the car look how I wanted: a used and probably much-loved but rather uncared-for old 2CV that might still be in use somewhere in deepest France.


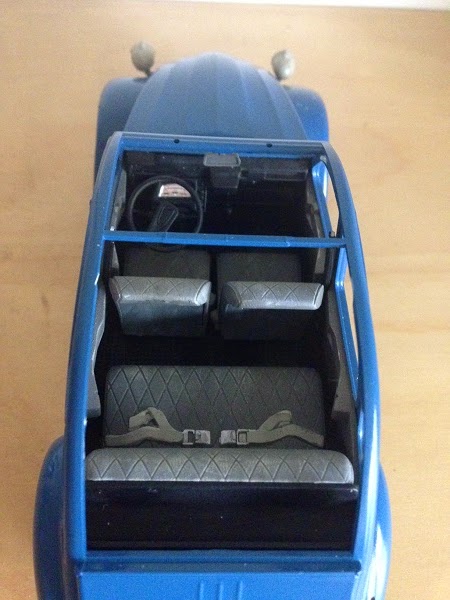
As had been the case throughout the build, the last few pieces went together very well and fitted nicely. It is easy to forget that things like door handles and windscreen wipers were commonly moulded in place as part of the body shell on older car kits, and the improvement in the finished model thanks to the use of separate parts for such things in this kit is apparent.


The only thing I’m not really happy with is the lights. Firstly, I used Revell ‘clear’ colours for the amber indicator and red rear light lenses, and it really isn’t as effective as the Humbrol clear paint I normally use. Secondly, I was concerned that the headlamp reflectors looked a little too dark, as the chrome plating applied during manufacture had not coated the insides of the light reflectors very well. I brushed some silver paint into the headlight reflectors to try to improve it, but after fitting the clear lenses I still think the headlights look too dark.


On the other hand, this was my first time using Humbrol’s new washes and weathering powders, and I am pretty happy with the result. I wanted the wheels and bodywork to look used and to show an accumulation of dirt together with a suggestion of rust, and though it’s not a show winning job the end result is just about what I wanted. Dark grey wash was used to darken the panel gaps and to make a dark stain beneath the fuel cap to suggest fuel spills, and rust wash was applied sparingly along the door bottoms, beneath the windscreen and under the bonnet sides. Dust was then brushed gently along the lower panels and bumpers.


Overall I'd recommend this kit. There are various ways to build it - a smart Charlston edition like the kit was designed to be, an old hack like the one I have built, or perhaps a racer or a family car loaded down with groceries or luggage. Quality is good and you should encounter no real issues with this kit.

Wednesday 17 September 2014

On the Bench: Citroen 2CV Part 3

Time for a quick update on progress with the Revell 1/24 Citroen 2CV, which I am building using only minimal tools and paint, on my kitchen worktop, while my modelling gear is packed up for my upcoming house move.

As explained in an earlier post, I have painted over the chrome grille, bumper and headlamp parts to make my 2CV look like a bog-standard base model.

In my last post, the main subassemblies – chassis, body and interior – had pretty much been completed, and I explained that I will not be building the engine. Since then, those main parts have come together to make the 2CV recognisable, and I have to say I think it’s starting to look like a great little model. One job I hadn’t done last time was to fit the steering gear: I did this one evening, following the instructions and using tweezers heated in a candle flame to flatten the ends of the kingpins and create a working steering linkage to allow pivoted, poseable steering.

Stance is very typical for a 2CV. This is a good-quality kit.

After that, I fitted the wheels (these still need properly weathering on their back faces), fitted the dash and steering column into the interior, fitted the interior assembly to the chassis, and finally fitted the body over the whole lot. As a result, my 2CV has started to take on its final shape. I also added the headlamps (without glasses), bonnet and grille and front bumper.

Suitably basic interior. The instrument cluster is represented by a decal.

Friday 5 September 2014

On the Bench: Citroen 2CV Part 2

The Citroen 2CV begins to take shape as its sub-assemblies are built and painted.

Last time, I had more or less finished painting the 2CV’s body and all the other kit parts. That meant it was time to begin assembly, and the first jobs were the chassis and interior. The kit instructions, as with many car models, begin with building the engine but I have decided not to bother building the engine on this model. Instead, I will simply glue the bonnet closed and make it a ‘kerbside’ or ‘curbside’ as the Americans call it – that is, a car model with no engine detail. I’ve chosen to do this because despite having spent many hours building model car engines in the past, when the models are displayed I like to have the bonnets closed, meaning all that effort is only seen if I go and open the bonnet to have a look – and I hardly ever do!


The almost-finished chassis, painted, with the interior floor which has been painted and dry-brushed.
 

So, it was straight on with the chassis and interior. I must say that the quality of this Revell kit immediately became obvious, as the fit of the parts is very good indeed. Not only that, but the part sprues/frames have been moulded intelligently: the ‘gates’ which attach the parts to the spures/frames are small and are located in places where the cut marks from cutting them free will be invisible on the finished model, avoiding the need to go round the model touching in loads of small imperfections where the parts were cut loose. Also, the one-piece chassis and floor pan includes a wealth of moulded-in detail including the legendary 2CV interlinked suspension units. The chassis was 80% completed by simply attaching the front and rear axles with their swing arms, plus the one-piece exhaust system. All that remains to be added is the steering rack and kingpins, which are pivoted to allow the front wheels to be posed in a ‘steered’ position.


The chassis and wheels having received some weathering with Humbrol washes.

I recently purchased some weathering washes and powder from the Humbrol range, just to see how they worked, and thought this model would make a nice test bed for them. I have not used these pre-prepared washes before, so I wasn’t too sure how to get the best from them or what sort of result to expect, but I must say the results are quite pleasing for a first attempt. All I did was give the chassis a quick wash over with Humbrol ‘Rust’ wash, focusing on the edges of the floor pan and other areas I thought might be extra rusty like the exhaust, and let it dry. I then brushed a little ‘Sand’ weathering powder over it here and there to add some tonal variety, and that was it. If you haven’t tried using pre-prepared commercial weathering washes before, I recommend you give them a go. I also gave the car's wheels a couple of heavy washes with Humbrol dark grey weathering wash to suggest general filth and brake dust.
 
Seats installed on the interior floor, with some light dry-brushing and powdering to suggest wear.
 
The interior goes together quite easily, again with plenty of detail which unfortunately won’t really be visible when the model is finished. For example, the seats are supported by thin frames as on the real car, but these will be hidden after final assembly. Again, all the ‘gate’ marks are hidden during assembly thanks to Revell’s clever moulding.

Monday 1 September 2014

Down Memory Lane 3: A New Beginning


Having looked at my early beginnings as a modeller in Part 1, then my teenage years in Part 2, I’m going to look back now at my late-20s, when I returned to modelling after a gap of almost ten years.

The Mercedes 540K roadster was my first step back into modelling.
 
Like many modellers, I started young, developed my skills into my teenage years and then life – or more accurately, my social life - took over from my old childhood hobbies. The world of work, and a 3-year stint at university, took over my life together with its attendant friendships and social activity. I probably also thought it was time to leave behind the things of my childhood, as is often the case at that time in your life. However, after leaving student life and getting stuck into full time work, it was only a couple of years before the mundanity of the 9-5 life and the inevitable toll it took on my former carefree, social lifestyle left me looking for something undemanding and rewarding to do in my spare time. Spotting a Mercedes 540K kit in a model shop on Burleigh Street in Cambridge, I assembled some paints and tools and took the kit home. I soon completed it, and found to my satisfaction that a) my basic skills had not suffered too much in my years away from modelling, and b) my more patient attitude as a working adult, now acclimatised to the frustrations and imperfections of daily life in the world of work, helped me to achieve a higher standard of finish simply because I was happy not to rush the project.

The German SdKfz was the first of many military kits I was to build.
 
More trips to the model shop yielded more kits, and I started getting more into military modelling, starting with a German SdKfz 232 radio car. I then took on more of a challenge, and built a diorama featuring a German King Tiger tank with its crew at rest at the roadside, which I gave to my brother as a Christmas present. Around this time I picked up the remnants of my old modelling tools from my parent’s place where I had left them, and I was still essentially using the same tools and techniques I had been using since my very early days.

The Aztek A-470, complete with changeable spray nozzles and paint cups.
 
In 2003 I moved to London for work, of course taking my model supplies with me, and that winter I began a new chapter in my modelling career with the purchase of an airbrush – an Aztec A-470. I had dabbled with a simple spray gun before, which was powered by compressed air from an aerosol can. My first attempts with my new airbrush also used an aerosol can but I soon found this to be very problematic: firstly, compressed air from a can cools dramatically when you discharge any amount of it, and on my first couple of projects I found the air became so cold that the airbrush nozzle froze. Secondly, as you use more air propellant from the can, the can becomes lighter and more inclined to keep toppling over. Thirdly, the cans eventually run out of air! So that winter I bought a nice air compressor from Machine Mart, with an electrically-powered compressor pump and a 6-litre ‘receiver’ or air tank to hold air compressed up to 110psi.
 
A Panzer II was one of my first airbrushed models.
 
After a few early failures, I soon managed to achieve a mediocre but useful standard of even spraying with the airbrush. The many fascinating techniques for fine detail spraying and airbrush weathering were still beyond my skill level, but I could lay down smooth coats on my models. That Christmas my brother received another diorama, this time a German Panzer II in a Parisian fighting scene, and with the tank and the road surface sprayed using my new airbrush.
 

Next time: Down Memory Lane comes right up to date, and sees the growth of a guilty secret - 'the stash'.....